

Interface for creating a Move. The screen is divided into several parts: Header (1), From Stock (2), To Stock (3), Document Details (4), Lines (5) and Description and Note (6).
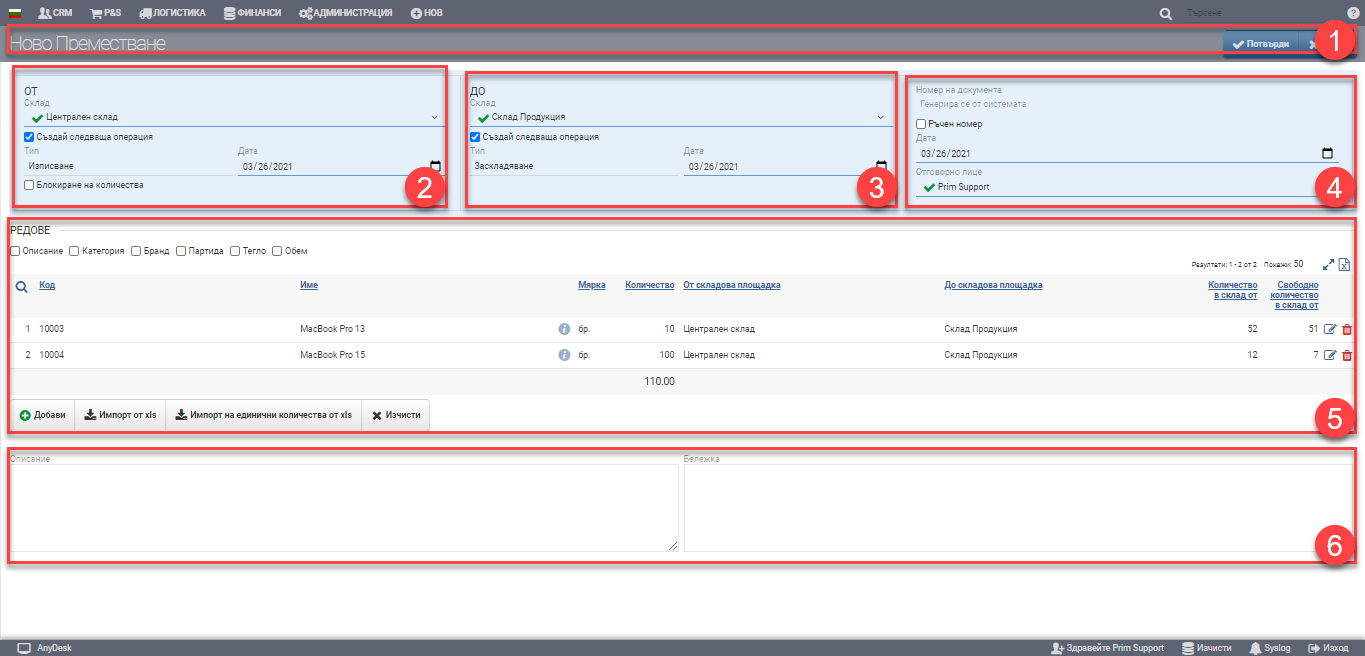
Header (1)
In the Header (1) you see the name of the document you are creating and two buttons for Confirm and Cancel.
From stock (2)
In the From Warehouse (2) section you need to select which warehouse you will be moving from. This is the warehouse where the items will come from. You can choose which warehouses you have rights to move.
Once you have selected the warehouse you will be moving from, you can block quantities of the items using the Block Quantities checker.
If you are the MOL of the selected warehouse, the Create Next Operation check box will appear. This will open two more Type and Date fields. The type of the next operation is Check Out, which will take the goods out of the warehouse, and its date is automatically loaded as today’s date, but can be changed manually.
If you have chosen to do a subsequent Check Out from Warehouse operation, it will be generated automatically when you confirm the move.
Next to warehouse (3)
In the To warehouse section (3) you need to select which warehouse you will be moving to. This is the warehouse where the items will enter. You can choose which warehouses you have rights to move.
If you are the MOL of the selected warehouse, the Create Next Operation check box will appear. This will open two more Type and Date fields. The type of the next operation is Warehouse, which will enter the goods into the warehouse, and its date is automatically loaded as today’s date, but can be changed manually.
If you have selected to do a subsequent Warehouse Clearance operation, it will be generated automatically when you confirm the move.
If you are the MOL of both warehouses, you can generate both the Checkout and Checkout operations.
Document details (4)
Document data (4) includes the following parameters:
| Field/Checker | Description |
| Document number | The document number is automatically generated according to the set numbering rules. When the move is saved, the date and time are also saved, and all documents that are automatically generated take those date and time. Unless they are explicitly changed. |
| Manual number | Checking “Manual Number” makes the Number field free for typing. The user decides what number the document will be. |
| Date of document | Date of issue of the document. Automatically loads current date, but can be changed by the user. |
| Responsible person | Responsible person for the relocation. Selected from a list of users. |
Lines (5)
In the Lines section (5) you can manually enter items to move, add them via XLS file or import unit quantities via XLS.
Adding items is done by clicking the button with the corresponding name. Initially, you are loaded with an interface with all the items in the inventory, and you can set it to display only the items available in the warehouse you will be moving from. The interface consists of Filter (1) and Result (2):
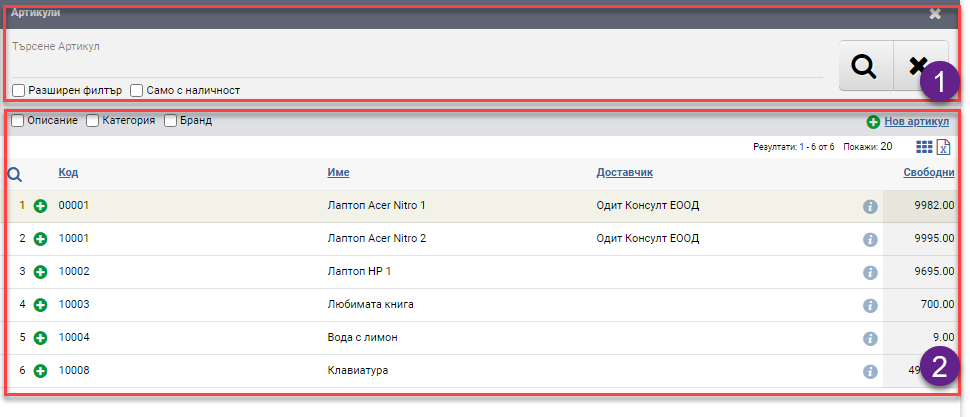
In the free Search box you can search by word, code, brand, etc. to find the item you want. You also have the option to turn on an Advanced Filter with Categories, Brand, Features and Supplier, which can help you find things faster. In addition, you can further filter by available items only. The search is launched with the Magnifying Glass on the left, and the Hicks clears all filters.
The items/services found according to the criteria set by the Filter are ranked in the Result (2). The table consists of the following columns:
| Column | Description |
| Opens the interface to add an item in detail to a move | |
| Code | Article code |
| Name | Item name |
| Opens item file | |
| Free | How many pieces are left free in the warehouse. |
The added items are arranged in Row (5) in a table with the following columns:
In addition to the columns containing basic information, you can also include and exclude additional columns of detailed data by means of check boxes:
| Column | Description |
| Description | Item description |
| Category | Category of item |
| Brand | Brand of the item |
| Batch | Batch of item |
| Weight | Displays the weight of the item as set in its file. |
| Volume | Displays the volume of the item as set in its file. |
Description and Note (6)
In the Description field (6), a free text description of the relocation is filled in. The description is displayed on the printed form of the move.
In Note (6) you can fill in whatever information you think is necessary in free text. The note is not displayed on the printed form, but is rather for internal use.
To save your changes, you need to press the Confirm button in the Header (1). If you want to exit without saving your changes, you need to press the Close button in the Header (1).
Important Notes:
You can’t select BOMs in a move because no inventory is kept on them. Inventories are kept only on the component parts of the BOM.