

The screen is divided into POS Details (1), Accounts (2) and Additional Parameters (3):
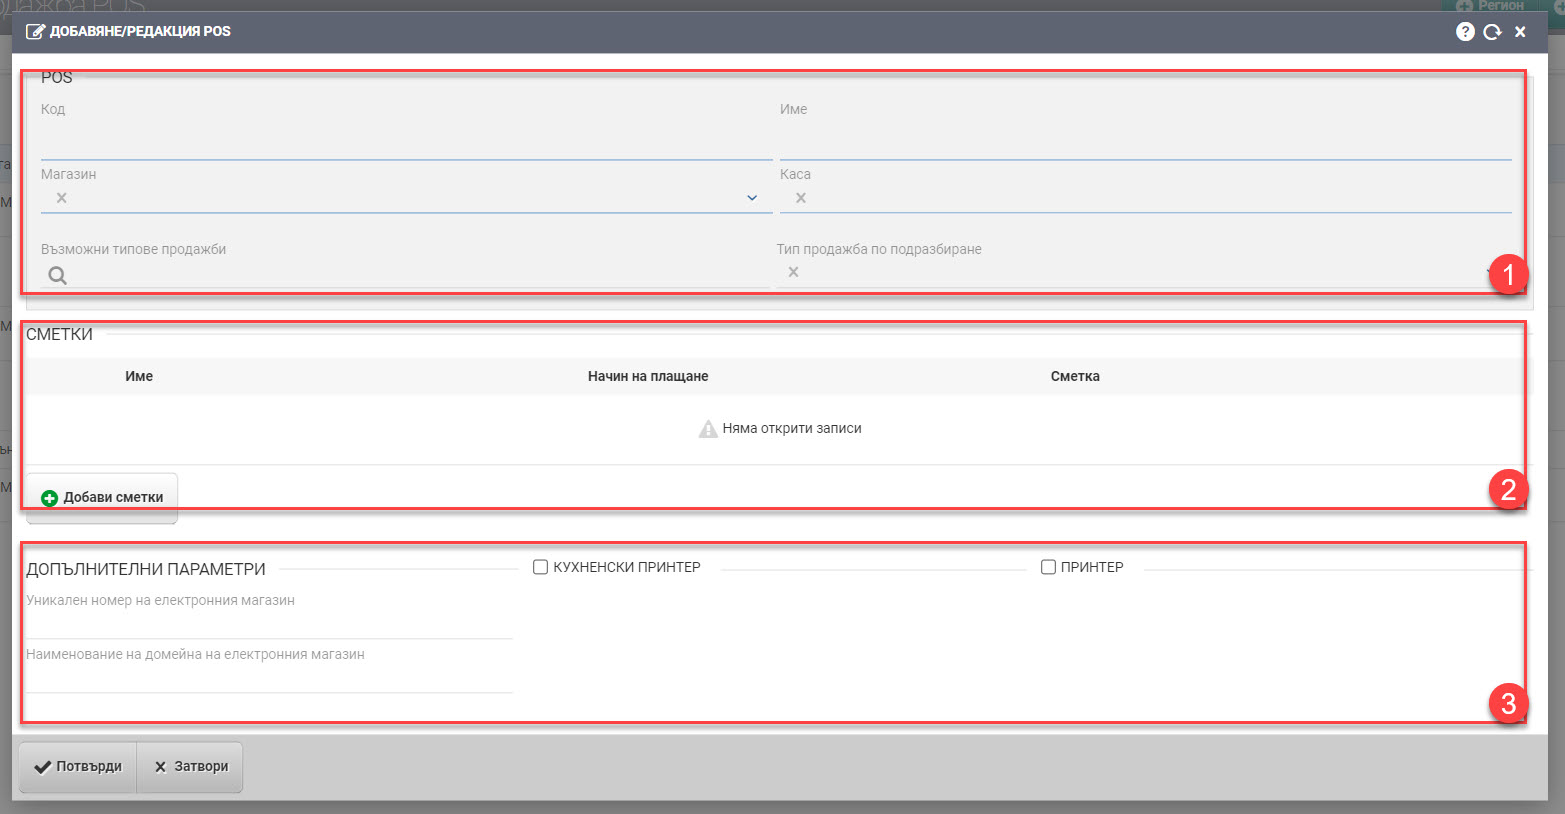
POS data (1)
In POS Data (1), you must enter information in the following fields:
- Code – enter the POS code. Mandatory for introduction.
- Name – enter a name for the POS. Mandatory for introduction.
- Store – select from a drop-down list of the stores you have already entered which POS is the store. A must for choice.
- Checkout – select an adjacent POS. As a rule, each POS should have its own cashier. Mandatory for introduction.
The following fields set how POS-A works. First, you choose which will be the possible Sales Types for the POS. You can choose one, two or multiple. Of all the possible sales types you have selected, in the Default Sales Type field you must select which one will be loaded first when the sales interface is opened from the POS in question. Both fields are required.
Bills (2)
In the Accounts field (2) you have the option to add an unlimited number of accounts in which to register your POS payments. If the cashier above is talking about paying cash at the register, there are several options here. You can add a sales account with any payment type already entered in the system. For example:
- Bank transfer
- POS terminal – you specify a bank account where the card payments from the POS will be reflected.
- Payment on delivery
- Postal translation
The field is optional to enter, but note that proper setup here is especially important if the POS is used in an integration system. The payment methods from the POS must match the payment methods on the site and the correct accounts must be set up accordingly to reflect the payments.
Additional parameters (3)
In the Additional Parameters you can enter the settings of the POS hardware integrations ( printer and “kitchen printer”, as well as the e-store data ( domain name and unique number) if you have one registered and issue electronic cash receipts. The fields are optional.
To save your changes, you need to click the Confirm button.