

The screen is divided into several parts: Header (1), Contractor (2), Company Data (3), Financial Settings (4), Document Data (5), Lines (6) and Justification and Note (7):

Header (1)
In the Header (1), you see the name of the credit financial document you are creating, as well as two buttons to Confirm and Cancel the document.
Contractor (2)
In the Counterparty section (2) you can select an existing counterparty (Search) or add a new one (Create). You can view the information of the customer you are crediting. It is imperative that you select the same counterparty to or from which the financial document you wish to credit is issued.
Company data (3)
Then you select fill in the Company details (3):
| Field | Description |
| Company | Company that issues the financial document. Select from a drop-down menu. |
| Office | Office from which the financial document is issued. It is selected from a drop-down menu that shows only the offices the user is allowed to work with. |
| Employee | Officer issuing the financial document |
| Commodity credit | You put a checker if the credit memo will be a commodity document and you reduce not only the price but also the quantity of the items. In Row (6), another column will appear with a field to write a quantity – Storable Trade Quantity. If you don’t put a check, the credit document will be a price credit, which only reduces or removes the price, not the number of items. |
Financial settings (4)
You then complete the Financial Settings (4) section of the document:
| Field/Checker | Description |
| Tax transaction | Choose from a drop-down menu of preset Tax Transactions. |
| Payment method | Choose from a drop-down menu of preset Payment Methods. |
| Reason for document reversal | Select the reason for the document reversal from the following: – Operator error – Return/Exchange – Reduction |
Document details (5)
Document data (5) includes the following parameters:
| Field/Checker | Description |
| Document number | The document number is automatically generated according to the set numbering rules. When the invoice is saved, the date and time are also saved, and all documents that are automatically generated take these date and time. The number when entering expense documents is always manual. |
| Manual number | Checking the box removes the automatically generated revenue document number and makes the Number field free to write. The user decides what number the document will be. The number shall be entered manually in the following cases: always in the case of financial expenditure documents in each document when ticking “manual number” |
| Date of document | Date of issue of the document. Automatically loads current date, but can be changed by the user. |
| Tax event | Date of tax event. Automatically loads current date, but can be changed by the user. |
| Currency | The currency of the document is selected from the list of currencies already entered. |
Lines (6)
In the Rows section (6), the credited items/services/categories are displayed, and the addition is done via the two buttons below the rows. The ways to add are described in the following pages::
- lines from issued financial documents, you can choose whether they will be by transaction or by item by clicking + add invoice line
- credit lines with + add line button
Note that the determination of the reversal quantity ( for commodity crediting) and reversal amounts (for price crediting) occurs after the rows are added as follows:
For price lending
Once you have added the rows you have removed the stock credit cheque in Company Data (3), the only field you can write in is in the Stock Amount column:
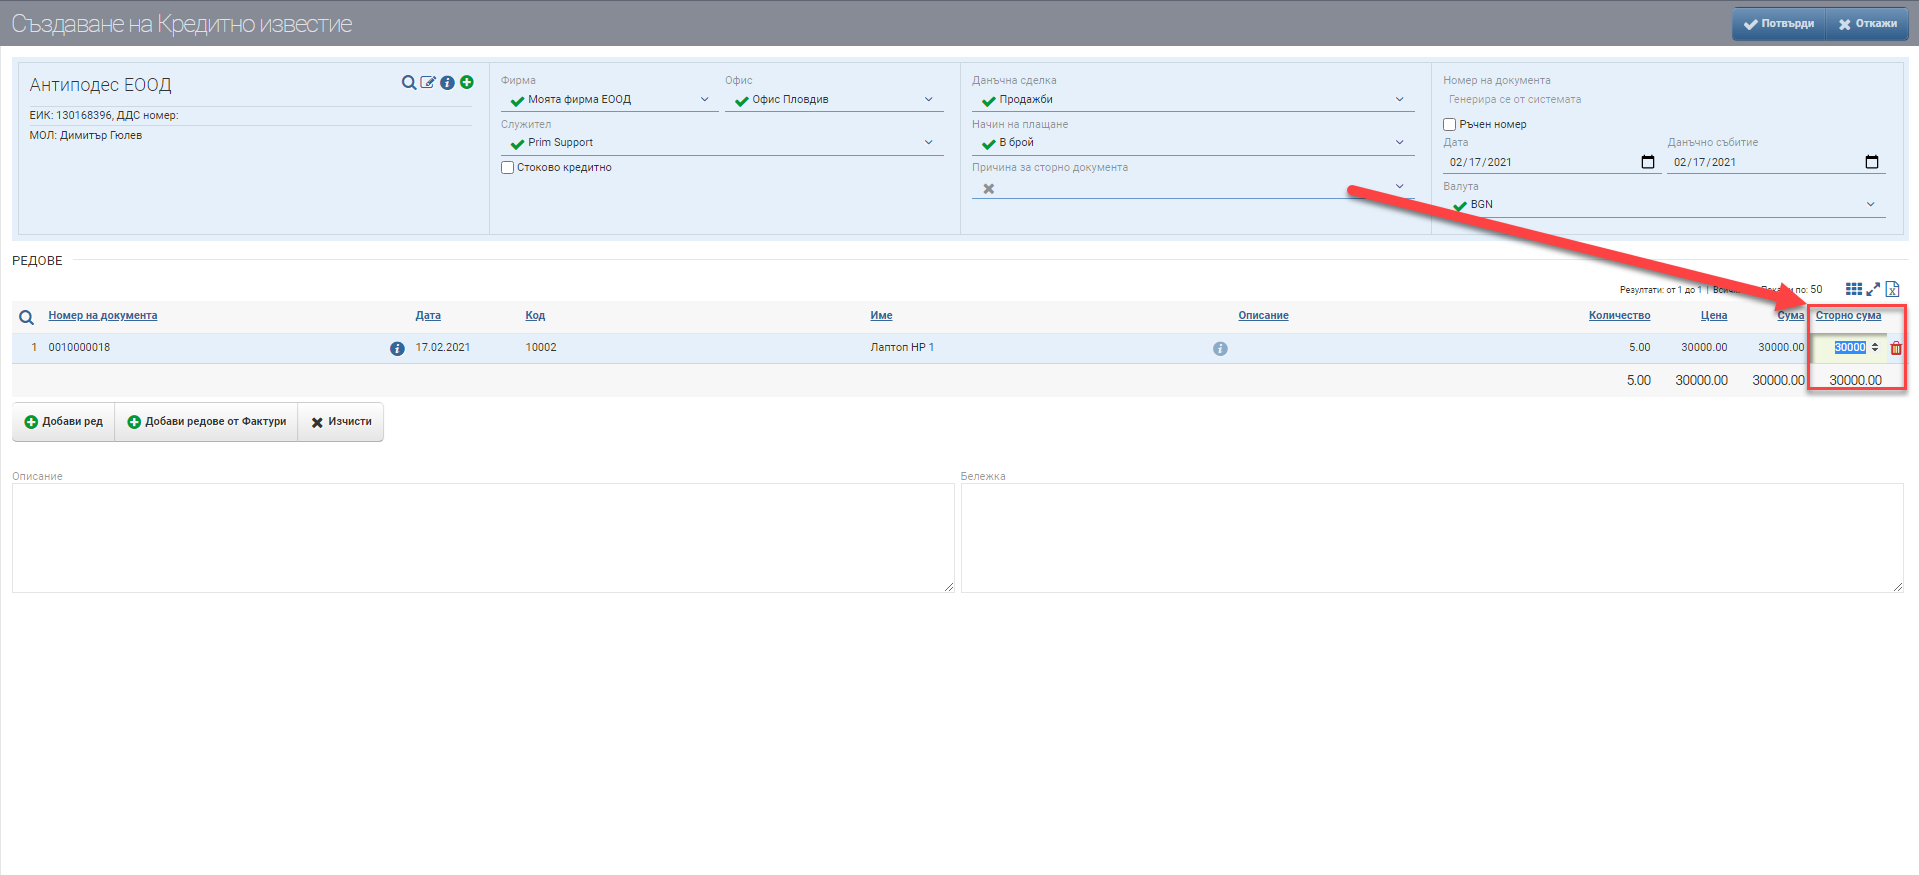
Here you specify the amount you want to credit.
Note that lines invoiced with a financial category only, i.e. not for specific items/services, only show up on add lists when crediting by price!
For commodity lending
Once you have added the rows you have put the stock credit check in Company Data (3), the only field you can write in is in the Stores Trade Quantity column:
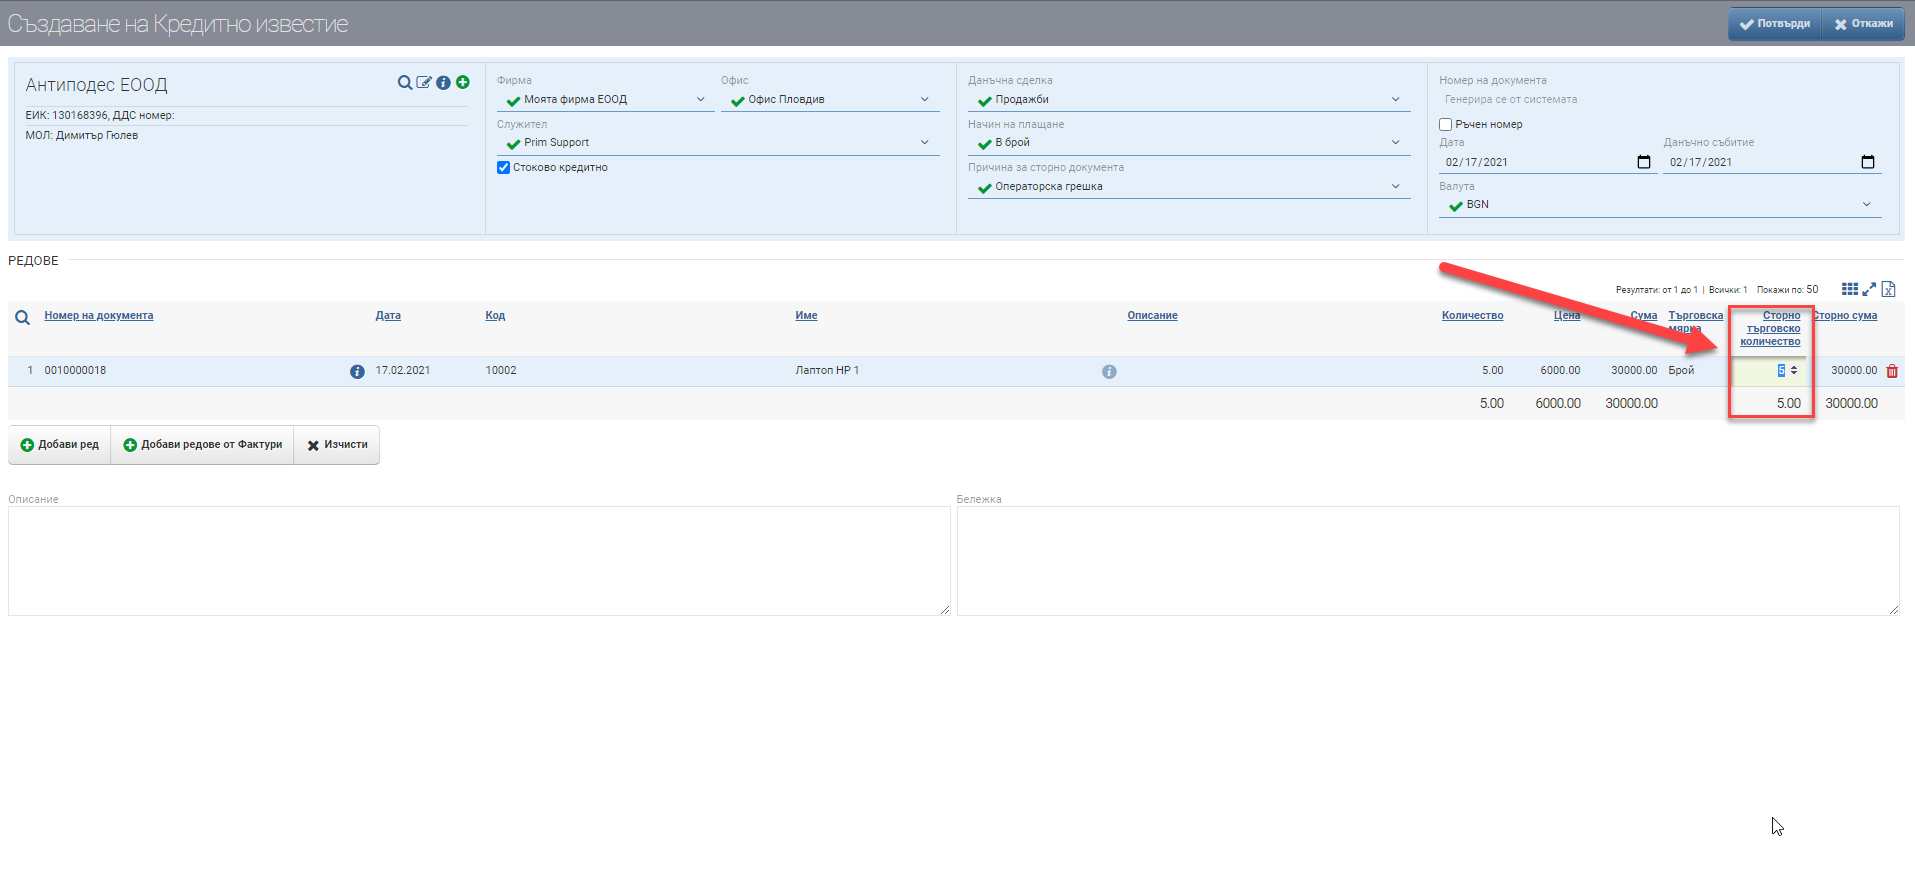
Here you specify the numbers you want to credit and the amount is calculated automatically.
Base and Note (7)
In the field Reason (8) the reason for the transaction is filled in free text. The justification is displayed on the printed form of the credit financial document.
In Note (8) you can fill in whatever information you think is necessary in free text. The note is not displayed on the printed form of the credit financial document, but is rather for internal use.
To save your changes, you need to click the Confirm button. If you want to exit without saving your changes, you need to click the Close button.