A cash transfer is a document that records the movement of cash from one account/cash to another account/cash. In order to complete a transfer, in addition to a “Transfer of Money” document, an expense payment document (PKO, bank debit) must be made from the account/cashier from which the amounts are leaving and a receipt payment document ( PKO, bank credit) in the account/cashier to which they are entering.
Pay attention to the configured account permissions! Any user who can see the cashiers/accounts and has permissions to post moves can order a Move Money, but only the MOLs of the accounts/cashiers can finalize it by issuing the payment documents.
Moving money in itself does not take money out or put money into the coffers/accounts. It orders the direction of money movement and the payment documents reflect it.
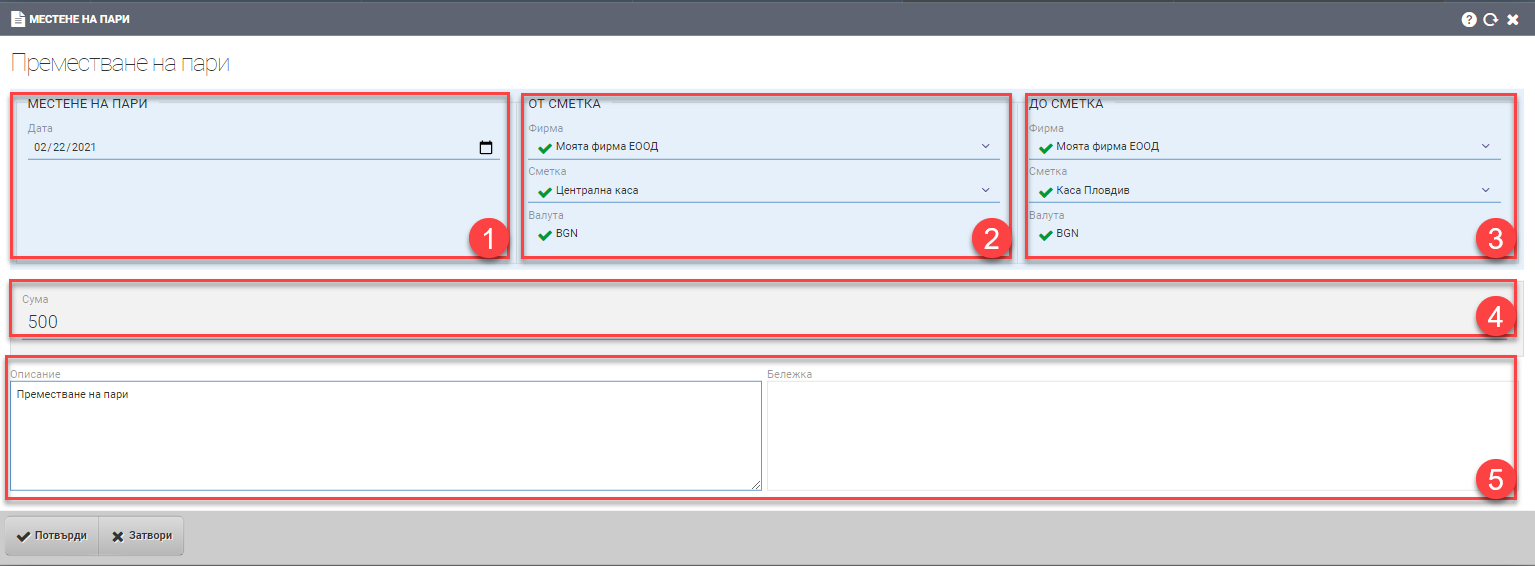
The interface consists of Document Data (1), From Account (2), To Account (3), Move Amount (4), Description and Note (5):

Document details (1)
In Document Details, you specify the date of the Money Move. The document number is always generated automatically.
From account (2)
| Field | Description |
| Company | Select the company from the drop-down menu whose account you want the money to come out of. |
| Account | Select the account you want the money to come out of from the drop-down menu. |
| Currency | Choose from a drop down menu in what currency the money will come out ( in what currency the expense payment document will be generated). |
To account (3)
| Field | Description |
| Company | Select the company you want the money to go into from the drop-down menu. |
| Account | Select the account you want the money to go into from the drop-down menu. |
| Currency | Select from the drop-down menu in which currency the money will be entered (in which currency the payment receipt will be generated). |
Removal amount (4)
You state what the amount of the relocation is.
Description and Note (5)
The Reason (6) field shall be filled in free text with the reason for the transfer. It is displayed on the printed form of the payment document. In Note (6) you can fill in whatever information you think is necessary in free text. The note is not displayed on the printed form, but is rather for internal use.
To save your changes, you need to click the Confirm button. If you want to exit without saving your changes, you need to click the Close button.