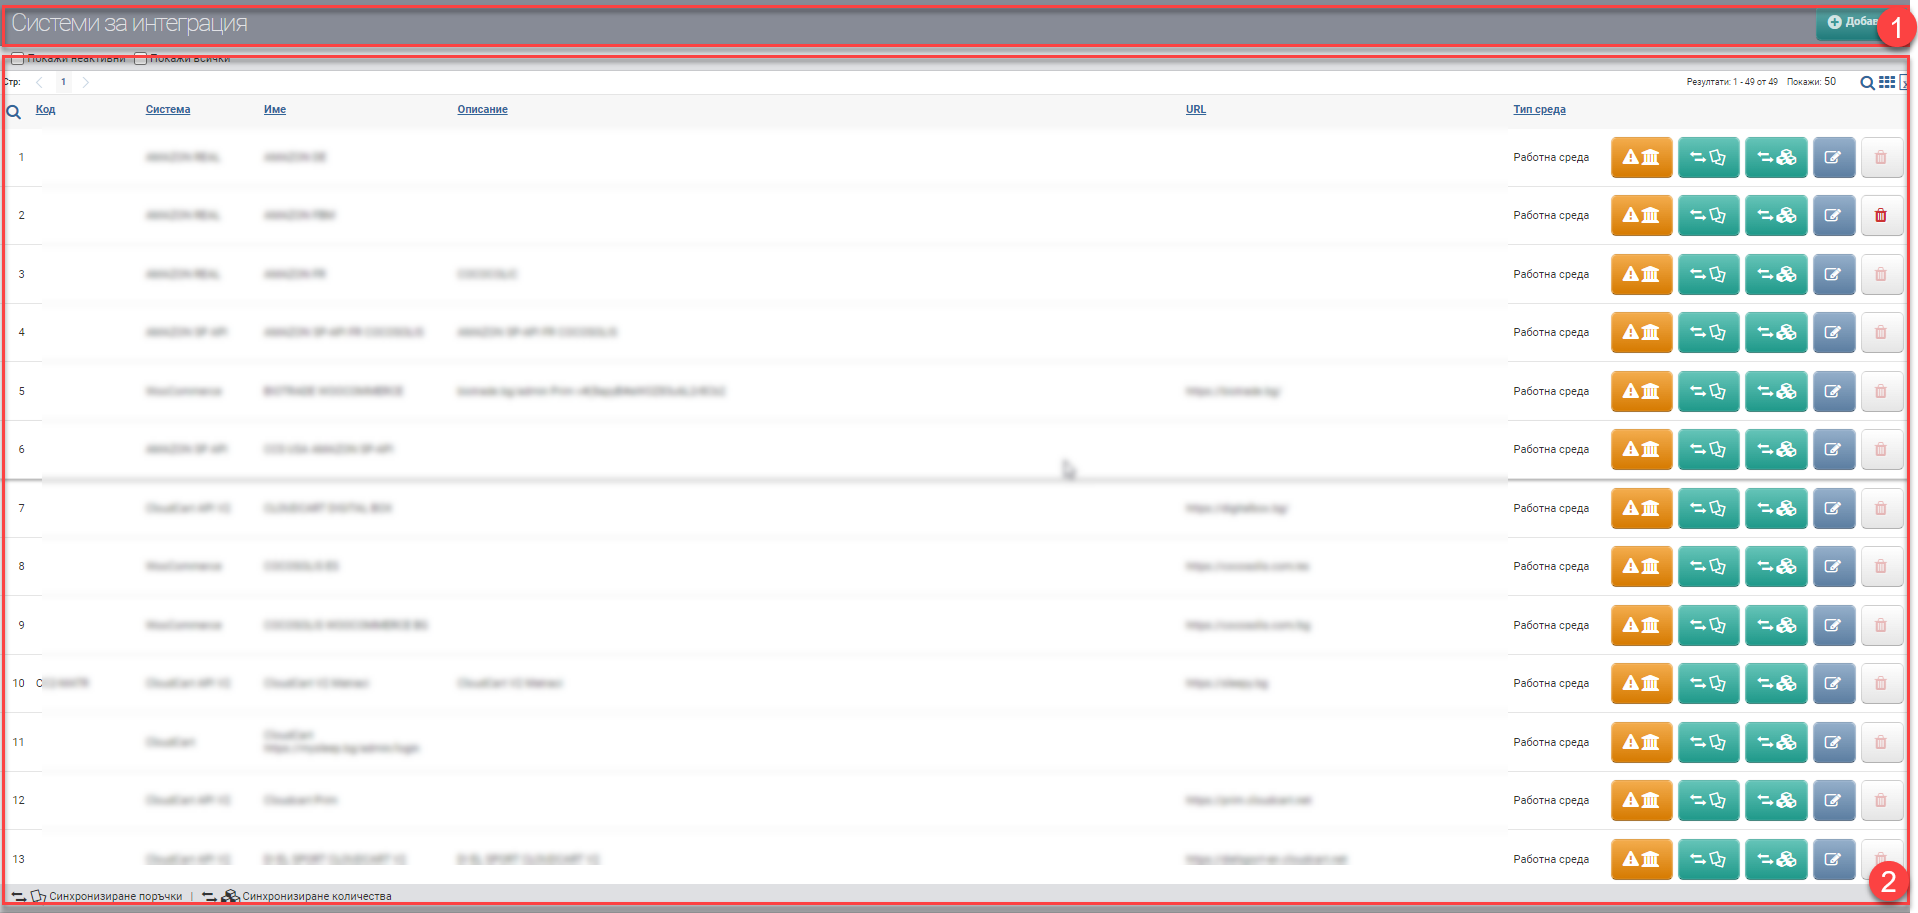
The interface consists of a Header (1) and a List (2):

Header (1)
In the header, you see the interface name and an Add button that you can use to add a new sales channel.
List (2)
In the list, you can see the active and inactive commercial systems integrations already in place.
Above the list, there are two checkboxes you can use to manage the results:
- Show inactive- only inactive integrations will remain in the list.
- Show all – the list will show both active and inactive integrations.
The table contains the following columns:
| Column | Description |
| Code | Trade channel code. |
| System | Type of integration system. |
| Name | Trade channel name. |
| Description | Description. |
| URL | Link to the shopping channel. |
| Medium type | Type of environment in which the integration is used: – Production environment – Working environment – Test environment |
You can perform the following actions on the list:
- – open the sales synchronization interface.
- – start synchronization of quantities.
- – open the system editing interface.
- – delete the integration data.